
[ad_1]
Should you’re working day out and in with emails, you recognize the wrestle of sending an electronic mail to a number of recipients.
Sending every electronic mail one after the other is time-consuming, and marking everybody in the identical electronic mail (the place the recipient can see others on the checklist) seems unprofessional. And should you’re not cautious in your method, your electronic mail may land in spam.
Should you’re in search of the easiest way to ship an electronic mail to a number of recipients with out going by the wrestle I simply talked about above, this weblog is for you.
On this weblog, we’ve got lined a step-by-step information on easy methods to ship emails to a number of recipients.
What does it imply to ship emails to a number of recipients?
Sending emails to a number of recipients means sending a single electronic mail message to multiple individual on the similar time. The e-mail will be addressed to all recipients directly, or it may be despatched to an inventory of recipients by a mailing checklist or distribution group.
This can be a frequent follow for companies, organizations, and people who want to speak with a number of individuals directly, similar to sending a company-wide announcement, sharing updates with a workforce, or sending out chilly electronic mail outreach.
Why Sending Emails to A number of Recipients is Useful
Sending emails to a number of recipients will be helpful for plenty of causes:
- Sending a single electronic mail to a number of recipients saves effort and time in comparison with sending particular person emails to every recipient.
- It permits for efficient communication with a big group of individuals, similar to colleagues, workforce members, purchasers, or subscribers.
- It permits coordination and collaboration amongst workforce members, guaranteeing that everybody receives the identical message and is on the identical web page.
- E mail is a cheap solution to talk with a number of recipients in comparison with different types of communication, similar to telephone calls or postal mail.
- Sending emails to a number of recipients will be an efficient advertising and marketing instrument, permitting companies to succeed in out to a big viewers with a focused message.
Nonetheless, it’s necessary to make use of warning when sending emails to a number of recipients to make sure that the recipients’ privateness and confidentiality are protected and to keep away from spamming or sending irrelevant messages to recipients who will not be . And thus we’ve got give you a step-by-step information that can aid you to ship emails to a number of recipients successfully:
A Step-by-Step Information on The right way to Ship Emails to A number of Recipients
There are a variety of the way to ship emails to a number of recipients, and listed below are among the finest methods to do it:
The right way to Ship Emails to A number of Recipients in Saleshandy
Step 1: Join Saleshandy
Enroll with Saleshandy and create an account.
Step 2: Create a Sequence
Upon getting signed up, you’ll land within the Saleshandy dashboard. Click on on “Sequences” and head to “Create Sequence” to get began.

Step 3: Compose your E mail
Begin composing the message you wish to ship to your recipients. Don’t overlook to personalize your topic line and electronic mail physique with mail merge tags. You may as well connect paperwork/information to your electronic mail. After you’ve composed the e-mail as per your liking, hit save.
Saleshandy gives an auto content material information that checks and supplies options that may be lacking in your electronic mail physique copy.

Step 4: Add Prospects
So as to add your prospect checklist in Saleshandy all you must do is click on on “Add Prospect”, choose your CSV file, and add the CSV in Saleshandy. If you’d like you possibly can add manually as properly. Saleshandy verifies and cleans the e-mail checklist to make sure a decrease bounce charge.

Step 5: Ship Check E mail
After writing the proper electronic mail and establishing the sequence within the Saleshandy, it’s time to ship a fast check electronic mail to test for any corrections.

Observe: The e-mail ID you talked about within the check electronic mail ought to be within the electronic mail checklist that you’ve uploaded.
Step 6: Schedule
It’s time to ship your electronic mail. All you must do is activate your sequence, and Saleshandy will begin sending your emails relying on the schedule you’ve gotten set.
Click on on the Pause button out of your sequence to activate.

Observe: For sustaining a superb sender status rating and higher electronic mail deliverability, we preserve a time interval between two consecutive emails of some seconds/minutes. It’ll make your ESP consider it’s a human-like sending.
The right way to Ship Emails to A number of Recipients in Gmail
To ship an electronic mail to a number of recipients out of your Gmail account, you possibly can comply with these easy steps:
Step 1: Getting Began
Start by logging into your Gmail account.
Step 2: Write
As soon as you might be in your Gmail account, search for the “Compose” field, and click on on it to start typing your electronic mail. This can open up a brand new electronic mail message window.
Step 3: BCC choice
After writing the e-mail, now you can proceed so as to add the recipients. Nonetheless, if you want to maintain the recipients’ electronic mail addresses personal, you should use the Blind Carbon Copy (BCC) choice as an alternative of the standard Carbon Copy (CC). The BCC choice will be sure that the recipients can not see one another’s electronic mail addresses.
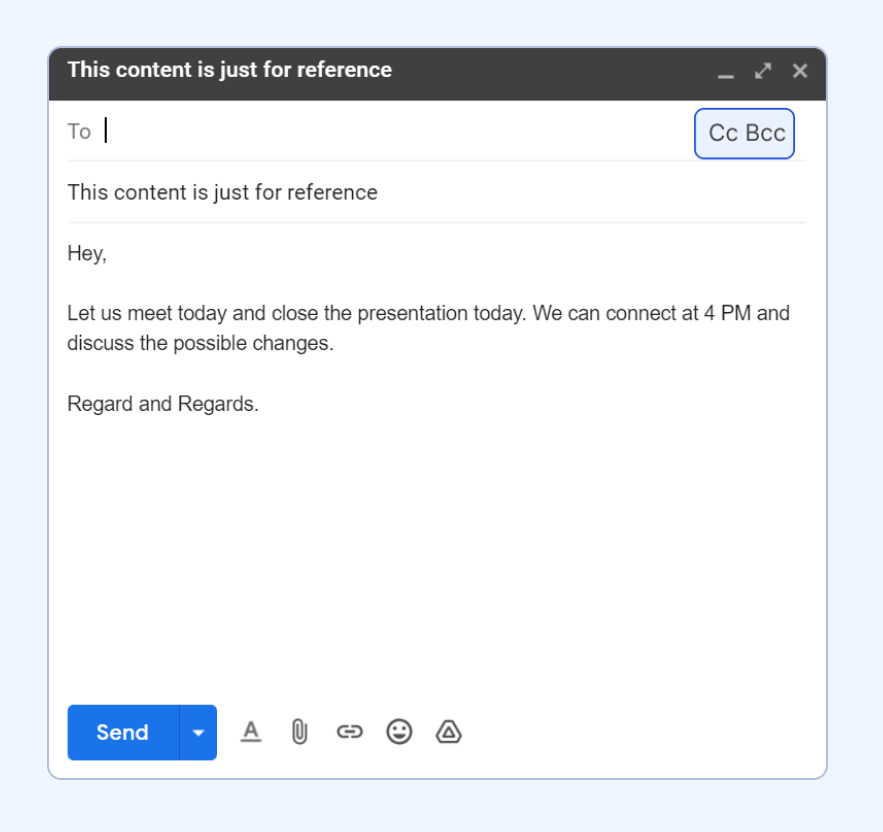
Step 4: Now fill within the BCC fields
To make use of the BCC choice, click on on the BCC discipline beside the CC discipline, which is often positioned beneath the “To” discipline.
Then, kind within the electronic mail addresses of the individuals you wish to electronic mail or choose one among your Gmail teams. It’s necessary to maintain not less than one individual within the “To” discipline to make sure that your electronic mail doesn’t find yourself within the spam folder.
Nonetheless, it’s advisable to not use this technique for over 10 recipients to keep away from being flagged as spam.

Step 5: Hit the Ship Button
Upon getting added the recipients, proofread your electronic mail, and hit the ship button to ship your message to the supposed recipients.
By following these easy steps, you possibly can effectively ship an electronic mail to a number of recipients whereas protecting their electronic mail addresses personal and avoiding being flagged as spam.
The right way to Ship Emails to A number of Recipients in Outlook
Step 1: Open your Outlook account and click on on the brand new message
First, navigate to your Outlook account and proceed to click on on the “New Message” button, which is able to create a contemporary message.
Step 2: Click on on Cc and Bcc so as to add recipients
Subsequent, find the “Cc” and “Bcc” choices and click on on them. This can allow you so as to add the e-mail addresses of the recipients you plan to incorporate within the message.

Step 3: Add the e-mail
With the intention to be sure that the primary recipient is the one seen recipient, choose the first recipient’s electronic mail handle and embody it within the “To” discipline.
Then, add the opposite recipients’ electronic mail addresses to the “Bcc” discipline. This can be sure that every recipient receives the message with out exposing their electronic mail handle to others.
Lastly, if you don’t want to incorporate any extra recipients within the “Cc” discipline, merely go away it clean.

Step 4: Ship
Upon getting accomplished these steps, you possibly can confidently click on the “Ship” button, figuring out that your message might be delivered to all recipients in an organized and environment friendly method, whereas additionally preserving their privateness.
The right way to choose a number of emails in Outlook
What are the other ways of choosing a number of emails in Outlook:
To pick out a number of emails in Outlook, comply with these steps:
- Open your Outlook inbox and go to the e-mail checklist.
- Click on on the primary electronic mail that you just wish to choose.
- Maintain down the “Ctrl” key in your keyboard.
- Click on on any extra emails that you just wish to choose.
- Launch the “Ctrl” key when you’ve gotten chosen all of the emails you need.
Alternatively, if you wish to choose a spread of emails, you should use the shift key:
- Click on on the primary electronic mail that you just wish to choose.
- Maintain down the “Shift” key in your keyboard.
- Click on on the final electronic mail that you just wish to choose.
- Launch the “Shift” key when you’ve gotten chosen all of the emails you need.
Upon getting chosen the emails, you possibly can carry out numerous actions on them, similar to shifting them to a special folder or deleting them.
Sending Emails to A number of Recipients based mostly in your necessities:
The right way to Ship Emails to A number of Recipients with Completely different Attachments
Right here’s a step-by-step information on How one can ship emails to a number of recipients with completely different attachments in Saleshandy:
Step 1: Register
Register to your Saleshandy account, should you nonetheless don’t have an account create one!
Step 2: Create your Sequence
Upon getting signed up, you’ll land within the Saleshandy dashboard. Click on on “Sequences” and head to “Create Sequence” to get began.

Step 3: Write your E mail
Compose the message you wish to ship to your recipients. Don’t overlook to personalize your topic line and electronic mail physique with mail merge tags.
Right here you must connect paperwork/information to your electronic mail.
For instance, let’s say you wish to ship two completely different attachments to 2 completely different teams of prospects. So in that case connect your first attachment right here.
After you might be completed with it, hit save.

Step 4: Create a New Sequence & Write your Second E mail
As you hit save after writing your first electronic mail you can be redirected to your electronic mail sequence tab. It’s essential to create a brand new sequence you identify it as “second group of prospects” (or something you need).
Inside your new sequence, you must craft your electronic mail once more, it may be a totally new model or you should use the identical model that you’re going to ship to your first checklist of prospects. However the one factor you must ensure that of is you might be utilizing a special attachment right here.
So persevering with with our instance, select the second attachment that you just wish to ship to your second group of prospects and hit save.

Step 5: Add Prospects
So as to add your first prospect checklist all you must do is click on on “Add Prospect”, choose your CSV file, and add the CSV in Saleshandy. And equally, you must add the second prospects checklist within the second sequence that we created in our earlier step.

Step 6: Schedule
Upon getting each your sequences prepared with completely different attachments, It’s time to ship your electronic mail. All you must do is activate your sequence, and Saleshandy will begin sending your emails relying on the schedule you’ve gotten set.

The right way to Ship Emails to A number of Recipients with completely different attachments in Outlook
Step 1: Getting the Fundamentals Accomplished
Signal-up for outlook should you haven’t. Open Outlook and click on on “New E mail” to create a brand new electronic mail message.
Step 2: Open Excel/Google Sheet
Our subsequent step is to place the names of the information into the particular columns of our information supply desk.
Let’s name the columns “Attachment 1” and “Attachment 2”.

Step 3: Carry out the mail merge.
Launch the utility from the Outlook Ribbon or as a standalone software.
As soon as the Normal tab settings have been made based on the utility configuration directions, you possibly can proceed to the Attachments tab to configure attachment mail merging.
To connect information to your electronic mail, you’ve gotten three choices:
- To connect the identical information to all of the emails, connect the information to the letter template.
- You may as well connect information from a folder.
- Fill within the Connect information from the desk discipline if you wish to ship the customized paperwork to each handle.

Step 4: Ship
Then, click on the “Ship” button confidently, figuring out your message has been delivered to all recipients in an organized and environment friendly method.
The right way to Ship Emails to A number of Recipients with out them figuring out
Right here’s easy methods to ship the identical electronic mail to a number of recipients individually in numerous electronic mail purchasers (Gmail, Outlook, and many others.) with out letting them know:
The right way to Ship Emails to A number of Recipients with out them figuring out in Gmail
Step 1: Create a New E mail
To get began, log in to your Gmail account and click on on the “Compose” button within the prime left nook of your display. This can open a brand new electronic mail window the place you possibly can compose your message.

Step 2: Enter “Undisclosed recipients”
Within the “To” discipline of the brand new electronic mail, enter “Undisclosed recipients” adopted by your personal electronic mail handle in angle brackets. This ensures that your electronic mail handle just isn’t seen to the recipients.
For instance, it ought to look one thing like this: “Undisclosed recipients<your electronic mail handle>”.

Step 3: Enter the E mail Addresses
Subsequent, click on on the “BCC” button (which stands for “blind carbon copy”) so as to add the e-mail addresses of your recipients. That is the place you possibly can add all the e-mail addresses you wish to ship your message to, separated by commas.
Through the use of the “BCC” discipline, you make sure that every recipient’s electronic mail handle is hidden from different recipients, which can assist defend their privateness and cut back the danger of your electronic mail being marked as spam.

Step 4: Compose a Message and Ship
Upon getting added all the required electronic mail addresses, compose your message as you usually would. Make sure that to incorporate a transparent topic line and a short, concise message that will get straight to the purpose.
If you’re able to ship your electronic mail, click on on the “Ship” button. Relying on the variety of recipients and the content material of your message, Gmail could show a warning message or restrict the variety of emails you possibly can ship directly.
It’s necessary to notice that whereas Gmail is usually a handy solution to ship bulk emails, it’s not designed for sending giant volumes of emails directly. If you must ship emails to a lot of recipients regularly, you might wish to think about using a devoted electronic mail advertising and marketing service as an alternative.
The right way to Ship Emails to A number of Recipients with out them figuring out in Outlook
Step 1: Getting began
First, open Outlook, and out of your Dwelling tab go to the Folks tab.

Within the Folks Tab click on on the dropdown you’re going to get to see three choices, out of them choose “New contact”.

Step 2: Including Undisclosed Recipients
Within the Full Title textual content field, enter “Undisclosed Recipients.” Within the E mail textual content field, enter your electronic mail handle. That is necessary, as a result of the e-mail might be despatched out of your handle, and also you need the recipients to know who it’s from. When you’ve added your electronic mail handle, click on Save & Shut.

Step 3: Reached a Milestone
Now you’ve reached a milestone! Shut the Folks Tab and Create a brand new electronic mail message in Outlook.
Step 4: Let’s transfer ahead
Within the To discipline, kind “Undisclosed Recipients.” As you kind, Outlook will show an inventory of options. Select the contact you simply created for undisclosed recipients. That is necessary as a result of it can guarantee that the e-mail is shipped to the recipients, however with out revealing their electronic mail addresses to one another.

Step 5: Choose Bcc
Now, it’s time so as to add the e-mail addresses of the recipients you wish to electronic mail. Click on on the Bcc button and add their electronic mail addresses. Should you’re typing the e-mail addresses manually, separate each with a semicolon.
That is necessary as a result of it can guarantee that the e-mail is shipped to every recipient, however with out revealing one another’s electronic mail addresses.

Step 6: Accomplished
Now, you possibly can compose your message as you’ll usually. Make sure that to test your message fastidiously earlier than you hit Ship. When you’re prepared, choose Ship and your electronic mail might be despatched to the entire recipients with out revealing their electronic mail addresses to one another.
Conclusion
In conclusion, sending emails to a number of recipients is usually a daunting job, however with the appropriate instruments and methods, it may be a breeze. We’ve explored some helpful suggestions and finest practices for sending emails to a number of recipients, together with creating clear and concise electronic mail content material, personalizing your emails, and avoiding spam filters.
Nonetheless, if you wish to take your electronic mail communication to the following stage and guarantee your emails are delivered, opened, and responded to, we extremely advocate Saleshandy. With Saleshandy, you possibly can ship customized emails to a number of recipients, observe electronic mail engagement, automate follow-up emails, and way more.
Don’t let the trouble of sending emails to a number of recipients maintain you again from attaining your corporation targets. Join Saleshandy at present and begin sending efficient emails to your audience. It’s the best choice to streamline your electronic mail communication and enhance your probabilities of success.
[ad_2]