
[ad_1]
Need to simply get began? Click on right here to join Hostinger and create an internet site immediately.
You possibly can create an internet site in lower than 20 minutes. You don’t should be a tech wizard both.
It doesn’t matter if it’s for enterprise or pleasure. You don’t want a elaborate designer or an costly developer. Simply comply with the easy steps under and also you’ll be on-line very quickly in any respect.
Fast Begin Guidelines To Create A Web site
Need to simply get your web site working as rapidly as attainable? Comply with these two steps to get your individual piece of web actual property up and working in quarter-hour or much less.
1. Join Hostinger. Choose their Single Shared Internet Internet hosting plan for simply $1.99 per 30 days. It’s a four-year contract, but it surely’s the most effective deal on the market and you get a free area title, too. Comply with the steps to create an account and buy the plan.
- Finest deal for internet hosting
- Excellent for WordPress websites
- Free area registration
- Begins at $1.99/month
2. Set up WordPress. 43% of the online is constructed on WordPress, and you may set up WordPress as your content material administration system (CMS) with only one click on out of your Hostinger management panel. You’ll use your CMS to regulate the feel and appear of your web site. It’s additionally the way you’ll add all of your content material.
Voila! In much less time it takes to look at an episode of your favourite present on Netflix, you’ll be able to have your new web site dwell.
If you wish to create an internet site that builds an viewers and makes you cash the fitting method, there is a little more to do. However don’t fear! All the things it’s essential know is roofed in the remainder of this submit.
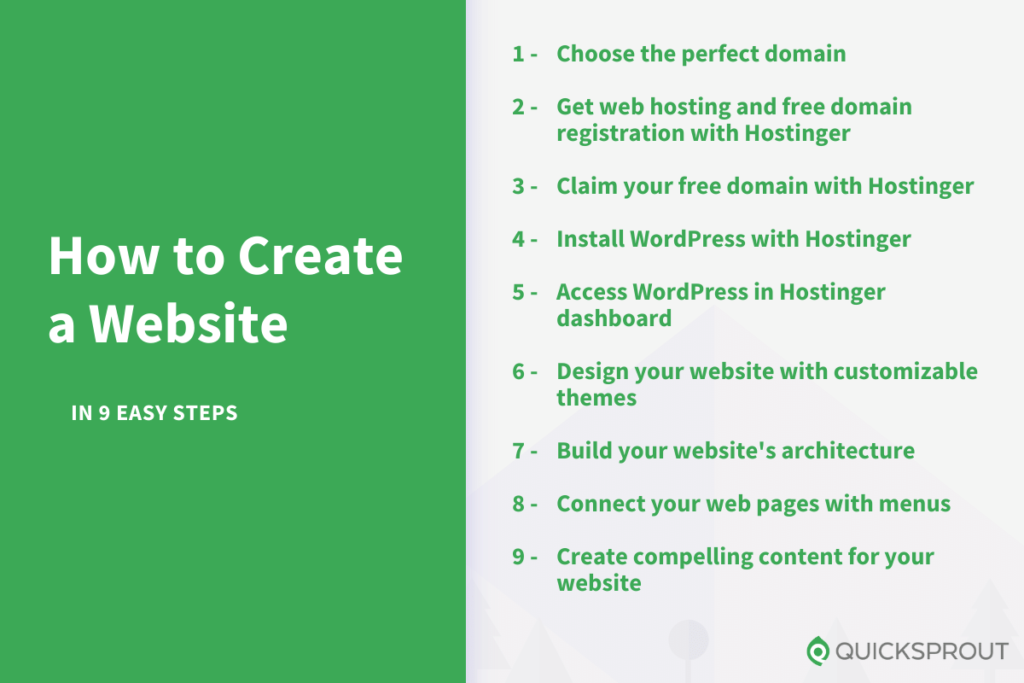
9 Steps to Create a Web site
Right here’s a abstract of the steps to construct your web site:
- Select the right area
- Get webhosting and free area registration with Hostinger
- Declare your free area with Hostinger
- Set up WordPress with Hostinger
- Entry WordPress within the Hostinger dashboard
- Design your web site with a customizable theme
- Construct your web site’s structure
- Join your net pages with menus
- Create compelling content material to your web site
Be happy to make use of these hyperlinks to leap round to the part you want as you create your web site.
Step 1: Select the Excellent Area
Selecting a website is a very powerful choice you may make to your web site. It actually says the way you need to be represented to the world. It’s the handle to your web site and the best way folks will bear in mind who you’re.
Whereas most of the finest domains are taken, that doesn’t imply you received’t be capable to discover a good area to your model.
When brainstorming good domains, take into account the next components:
- Simple to say and spell. Potential guests ought to be capable to say your area title out loud to somebody with out them having to ask twice find out how to spell or say it.
- Quick and candy. We suggest not more than 14 characters. You don’t need a very lengthy area title that’s exhausting to recollect and say.
- Go along with .com, .org, or .internet. Whereas there are many area title methods on the market, it’s finest to stay with the tried-and-true. You need folks to have the ability to bear in mind it, in spite of everything.
- Use your title. A very nice alternative for a private weblog, web site, or portfolio.
- Keep away from numbers and hyphens. This simply makes it look bizarre within the URL. Plus it makes it more durable for folks to say your URL to others.
Give you a couple of potential domains in case your best choice is already taken. The Hostinger Area Checker is free, and it’ll let you understand if the area title you need is accessible.
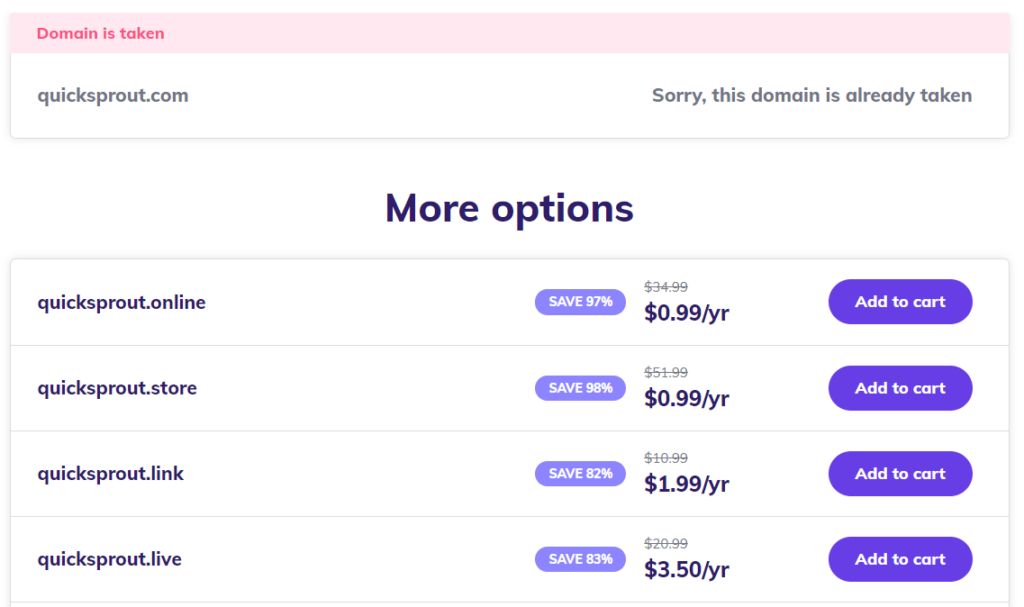
Kind your required title into the Area Checker. If it’s out there, incredible. If not, Hostinger will routinely present a couple of suggestions which can be near what you’re searching for.
Possibly one of many suggestions works for you. Possibly you need to strive a unique strategy.
I like to recommend you brainstorm concepts and search till you discover an out there area you want, quite than taking one thing that isn’t fairly proper simply because it’s out there. Should you get caught, you’ll be able to at all times strive one among many different free area title mills to kickstart your inventive circulate.
It’s attainable to purchase a website that’s already taken—however I don’t suggest doing that as a result of it’s very costly. In actual fact, high quality domains usually value a couple of thousand {dollars} at a minimal. I’ve seen it go as excessive as six or seven figures for a website.
My recommendation is to get scrappy, get inventive, and be versatile. It is possible for you to to seek out one which’s out there at an inexpensive worth.
Don’t add the area to your cart right now–you will get a website totally free by signing up for his or her Premium Shared Internet hosting service, which is what I like to recommend.
I’ll stroll you thru that course of subsequent.
Step 2: Get Internet Internet hosting and Free Area Registration With Hostinger
An internet site wants simply two issues to go dwell: A website title and an internet host.
You simply got here up together with your area title. Now it’s time to place it to make use of with a very good net host.
We extremely suggest you employ Hostinger to your web site’s host. They provide quick and dependable webhosting. Hostinger additionally permits you to register your area freed from cost.
- Finest deal for internet hosting
- Excellent for WordPress websites
- Free area registration
- Begins at $1.99/month
You may get Hostinger immediately for simply $1.99/month utilizing our low cost hyperlink. It’ll offer you all it’s essential get your web site up and working.
Begin by going to Hostinger’s web site. Then click on on Begin Now.
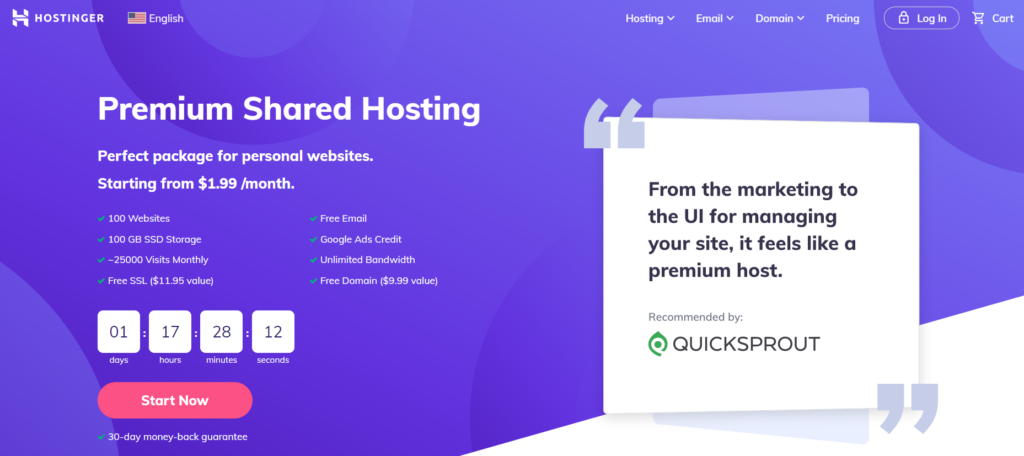
It’ll offer you three choices for shared internet hosting, which is the kind of internet hosting most individuals need to create a brand new web site.
Hostinger affords three choices for shared internet hosting: Single, Premium, and Enterprise:
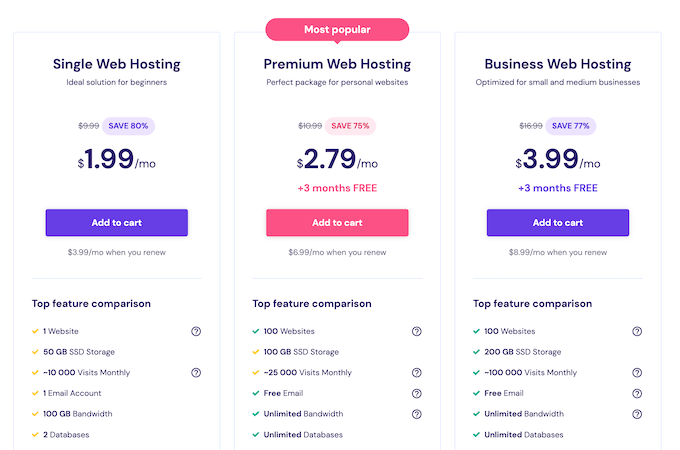
I like to recommend signing up for Premium except you have already got a website title.
My reasoning is that the Single Shared Internet hosting plan doesn’t include a free area, whereas Premium and Enterprise plans do. Because you want a website title as a way to have an internet site, the overwhelming majority of customers seeking to create a web site are going to need each area + internet hosting bundled collectively.
Each Premium and Enterprise plans include the power to create 100 web sites, 100 electronic mail accounts, and different instruments to maintain your web site at high efficiency.
The Marketing strategy comes with extra storage and bandwidth, so your web site will be capable to deal with extra visitors than with a Premium plan.
For many new websites, Premium will probably be greater than sufficient, however if you’re anticipating a ton of visitors instantly, Enterprise could be a better option. View a whole rundown of every little thing that’s included with every plan on Hostinger’s homepage.
As soon as you choose the most effective plan for you, Hostinger will ask you the way lengthy you need to join. Right here’s what that appears like for those who select the Premium plan:
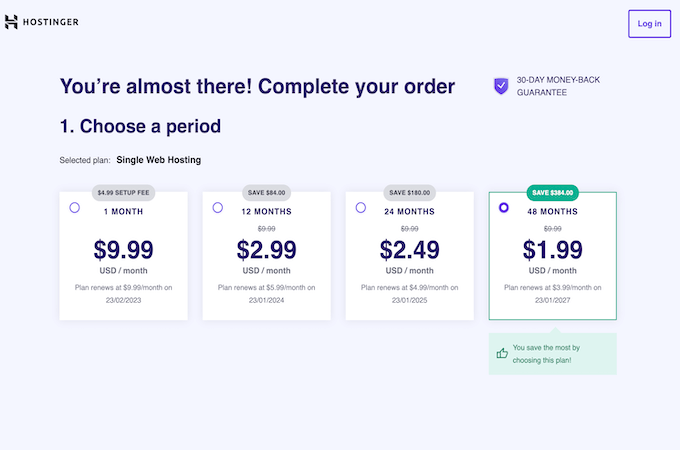
I selected the 48-month interval for my Premium plan in order that I may max out the low cost. As you’ll be able to see, I’ll wind up paying lower than $100 for 4 years of internet hosting!
That’s an exceptional worth, particularly when you think about that many different internet hosting suppliers cost additional for issues like SSL certificates, web site builders, electronic mail accounts, and different crucial options that Hostinger bundles in totally free.
After choosing the size of your internet hosting settlement, full the remainder of the knowledge on the web page.
- Register an account with Hostinger. You should use an electronic mail handle, or signup through an present Google, Fb, or GitHub account. No matter you select, make it an electronic mail or account that you simply examine usually, as that is how Hostinger will talk with you about any points that come up.
- Enter cost particulars. Hostinger accepts all main bank cards and quite a lot of on-line cost gateways, similar to PayPal, GooglePay, and CoinGate.
- Click on “Submit”. When you submit your cost, you will have 30 days to strive Hostinger risk-free. In case you are not completely satisfied together with your service, cancel throughout the first month for a refund.
As soon as your cost goes by way of, and also you verify your electronic mail handle, you’ll be capable to start organising your web site.
Should you want managed WordPress internet hosting, WPEngine is a incredible choice.
As a managed host, WP Engine professionally maintains pace and safety on the server degree, so that you don’t must do something. To be taught extra, take a look at our WPEngine Assessment.
For extra internet hosting choices, you’ll be able to learn our full evaluations of the most effective webhosting suppliers right here.
Step 3: Declare Your Free Area
You’ll obtain a welcome electronic mail from Hostinger as soon as your cost will get processed. From there, you’ll be able to merely comply with the onboarding directions to log in and finalize your account.
Hostinger will immediate you to reply a collection of straightforward questions on your new web site.
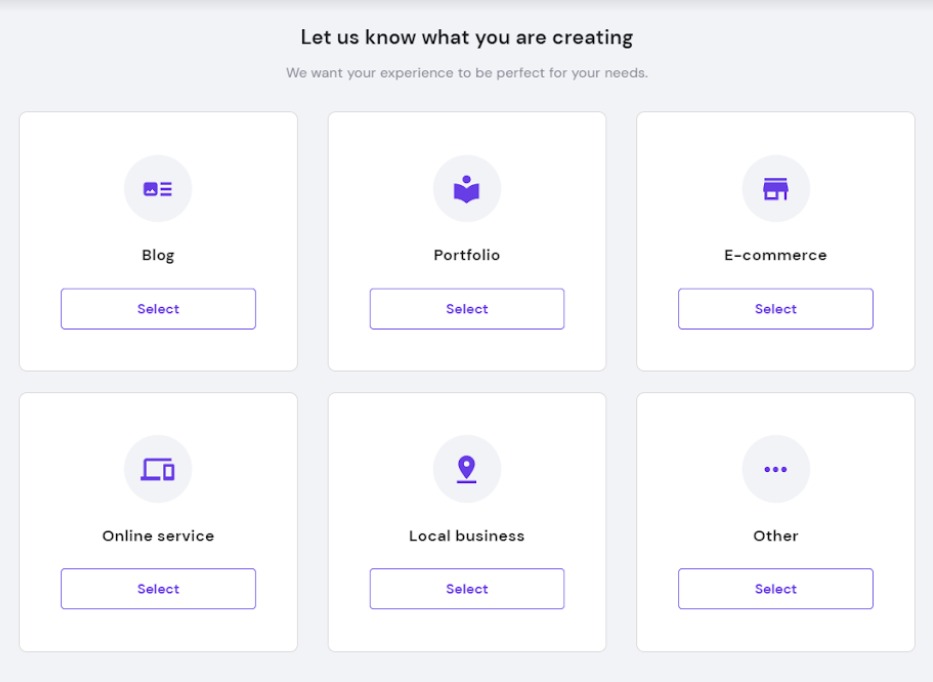
The questions are all very easy, and you will get by way of this step in only a few minutes.
Should you signed up for a Premium or Enterprise Shared Internet hosting plan, you’ll have the choice to say your free area right now.
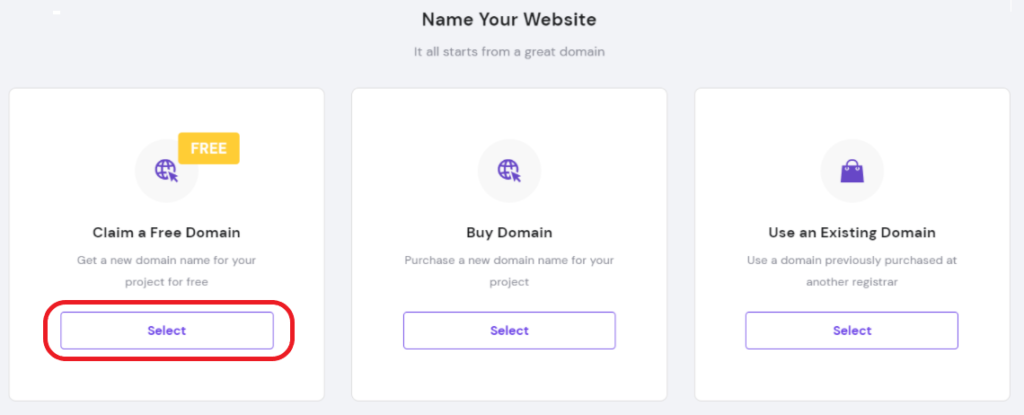
You’ll even have the choice to buy extra domains or join any domains that you simply already personal. Should you’re connecting an present area and need to change the area title to one thing new, now is an effective time to try this, too.
Your area is simply free for one yr, and it’ll routinely renew at a better fee. That is widespread apply for each webhosting supplier that gives free domains.
Simply keep watch over the renewal worth as you’re finishing this step to keep away from any surprises down the street.
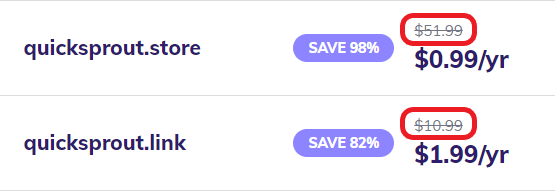
The quicksprout.retailer instance above is 50 instances increased than its beginning worth. That is extremely uncommon, however it may well occur for those who’re not cautious.
The quicksprout.hyperlink instance suits extra throughout the cheap vary for area renewal charges.
Step 4: Set up WordPress with Hostinger
Now it’s time to decide on your CMS (content material administration system), and WordPress is my high suggestion.
You’ll produce other choices to select from by way of Hostinger. However except you will have a niche-specific purpose to take action, WordPress is the most suitable choice for the overwhelming majority of recent web sites. It’s easy, reasonably priced, and offers you full management over your web site creation.
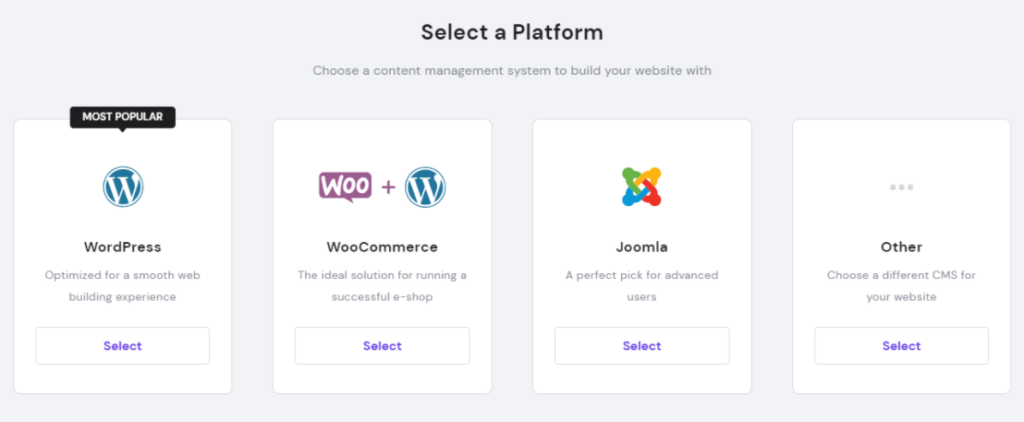
Create a brand new WordPress account and choose your theme.
The theme is actually the structure of your web site—controlling the best way it seems to be and feels.
Don’t overthink this an excessive amount of proper now. You possibly can at all times change your theme and customise the structure in a while. We’ll cowl these steps in better element shortly.
However for now, simply verify that your data is right to proceed.
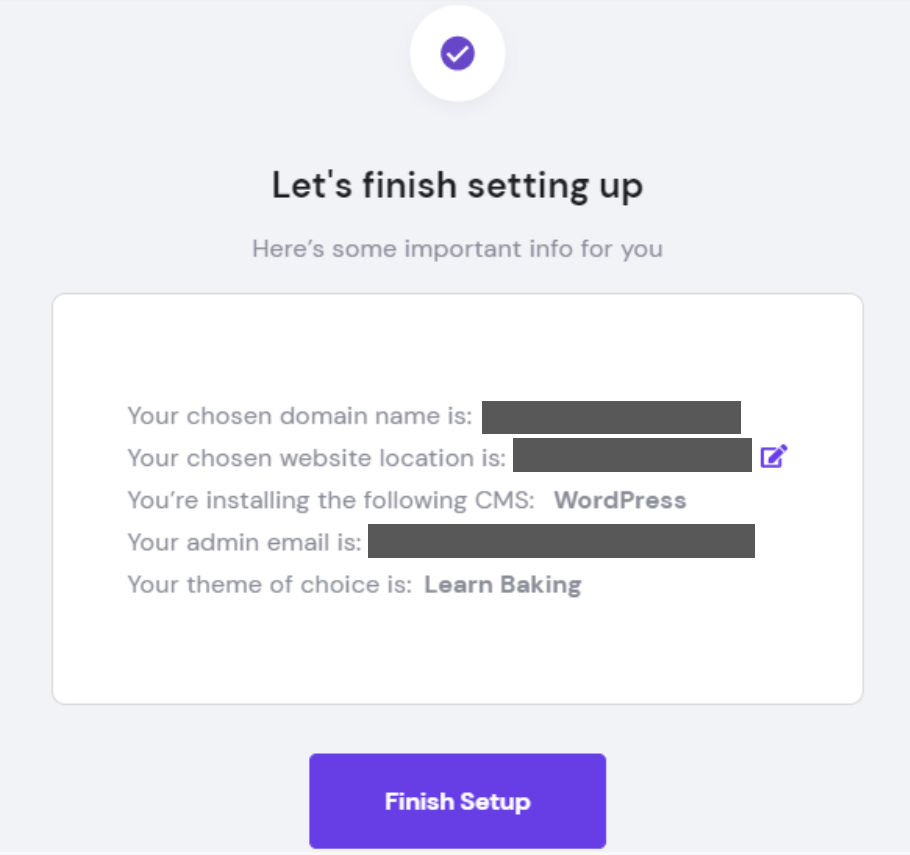
Double-check every little thing carefully. If Hostinger has your web site situated within the fallacious area, you’ll be able to alter it by clicking the pencil edit icon.
Click on End Setup when you’ve confirmed every little thing seems to be proper. The setup course of will take about 5 minutes to finish.
Congrats! You now personal a bit of the web!
Step 5: Entry WordPress in Hostinger Dashboard
Hostinger affords a really handy dashboard so that you can handle your web site. It’s often called hPanel, and may be very welcoming to new customers, so far as web site management panels go.
And you probably have any confusion, Hostinger has tons of assist about find out how to navigate hPanel.
You’ll be prompted to make use of WordPress to create your web site. Should you miss the prompts or skip them for any purpose, you’ll be able to at all times log in to WordPress utilizing the left-side dropdown panel within the dashboard:
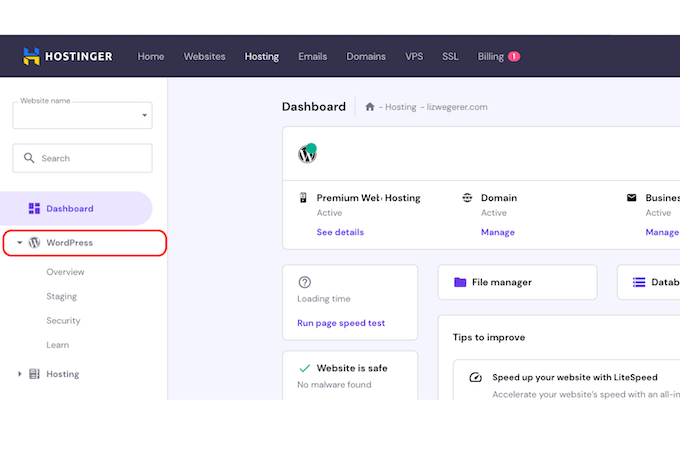
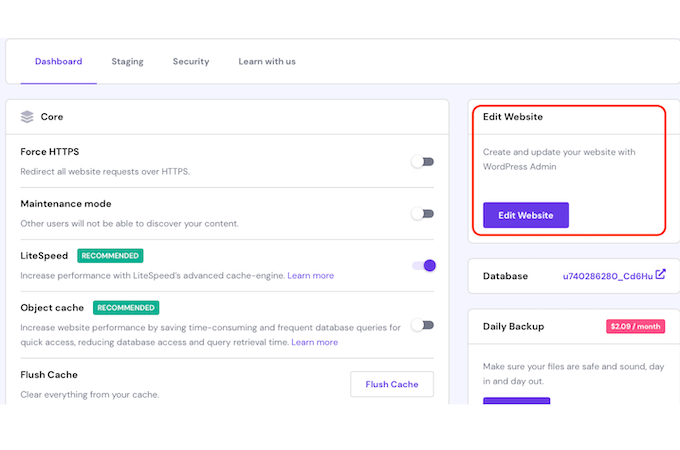
Click on on WordPress on the left facet of the display screen. You’ll see a brand new display screen that features a button to Edit Web site. Click on it, enter your credentials if prompted, and begin customizing your new web site.
Step 6: Design Your Web site with Customizable Themes
You already chosen a WordPress theme to construct your web site, and if you’re proud of the best way it seems to be, nice!
If you wish to see what else is on the market, you’ll be able to discover tens of 1000’s of themes on WordPress.org. A number of them are free. There are additionally some it’s essential pay for.
Professional tip: Don’t fear an excessive amount of about this part. It’s simple to get caught up with perfectionism and assume that it’s essential get your theme proper the primary time. That’s not true.
An important factor you are able to do is select a fundamental theme and go together with it. You possibly can at all times change your theme later.
Go to your WordPress web site’s administration dashboard. You are able to do this by way of the Hostinger dashboard, or you need to use the URL [your website name].com/wp-admin. Then merely use the username and password you bought within the earlier step.
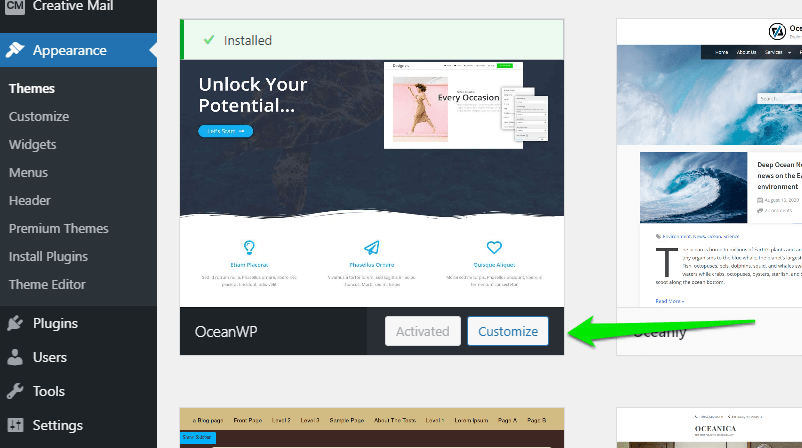
When you’re within the admin dashboard, go to your sidebar and click on Look>Themes>Add New Theme.
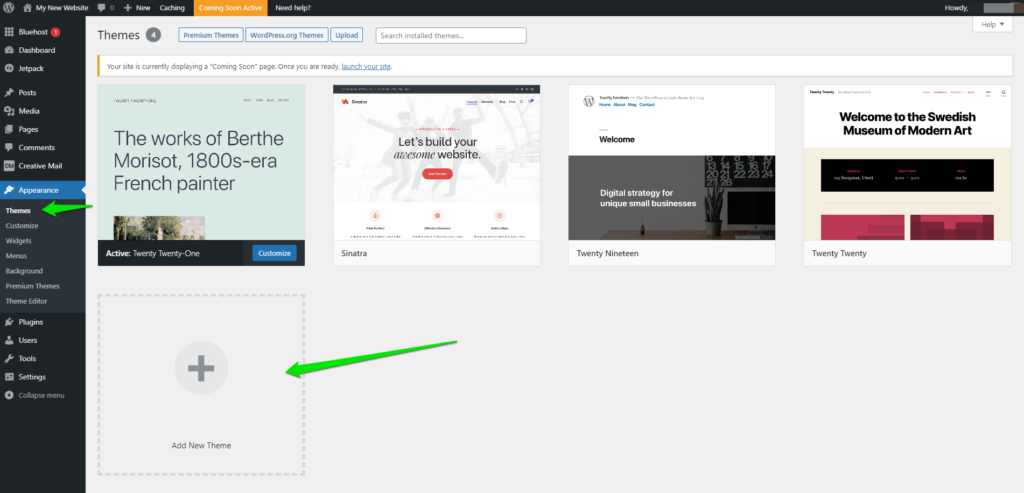
This can assist you to add any theme you need from WordPress’s library. Select one now.
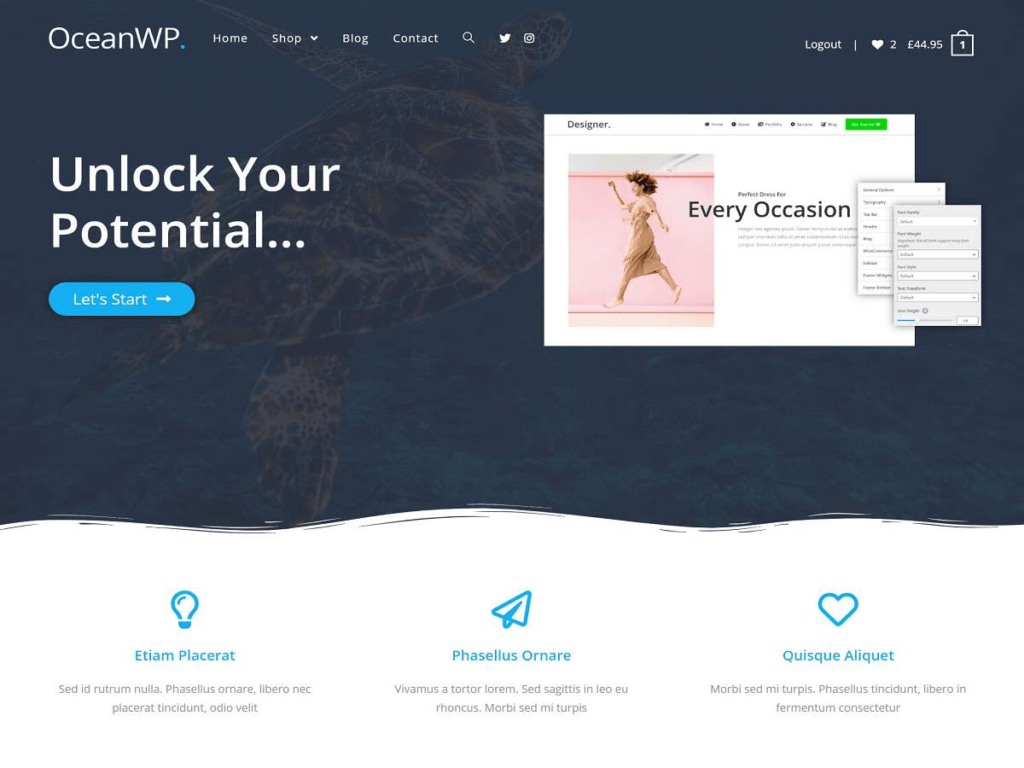
For this text, we’ll be utilizing OceanWP. This can be a free theme that’s very versatile. Whether or not you want a weblog, ecommerce retailer, or no matter else, OceanWP can get it achieved.
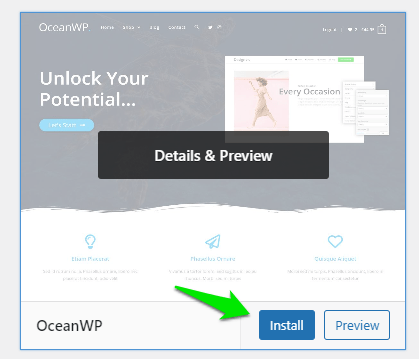
Seek for the theme utilizing the search bar. As soon as you discover it, click on Set up.
As soon as it’s completed putting in, click on on the Activate button. This can implement the theme onto your web site.
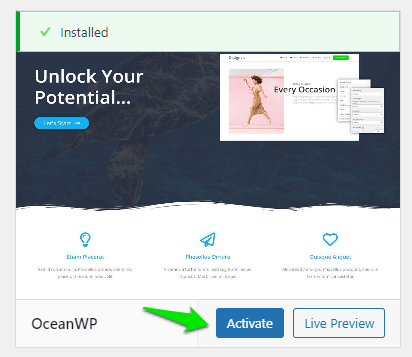
Now you can customise the theme to your liking by clicking on the Customise button.
You’ll now be capable to change any facet of your web site you need. This contains issues like your web site’s colours, menu choices, header photos, and extra.
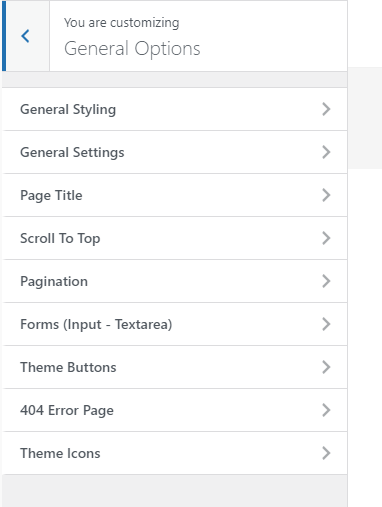
After clicking on customise, you’ll see a take a look at your web site as you customise it in addition to a left sidebar with totally different customization choices.
Every theme affords totally different choices, however there’s loads of overlap between themes. We’re going to enter extra element about what every choice does—and whether or not or not it’s important:
- Website Id. Essential. This space will assist you to change your web site’s title in addition to a sub-head or tagline. In most situations, you’ll additionally be capable to add a web site icon as properly. That is the picture that seems in new browser tabs when persons are in your web site.
- Colours. Non-compulsory. Change your web site’s shade palette. For OceanWP, this part solely permits you to change the colour of the title textual content.
- Menus. Essential. It permits you to create a navigation menu to your web site. Your reader will use this menu to find and navigate to particular pages of your web site. You’ll additionally be capable to select the place the menu seems (e.g. high, footer, sidebar).
- Widgets. Non-compulsory. These are totally different instruments you’ll be able to place all through your web site similar to archives, calendars, search bars, and extra. Utterly optionally available, however may be useful relying on what web site you will have.

- Homepage Settings. Non-compulsory. This controls whether or not or not you will have a static homepage, or in case your web site routinely reveals your newest weblog posts. Once more, that is utterly optionally available and dependent in your web site’s wants.
- Further CSS. Non-compulsory. That is the place you’ll be able to add additional customization choices utilizing CSS code. This may be extremely highly effective you probably have the fitting sources and data to alter your web site.
- Common Choices. Essential. This part permits you to customise a ton of various elements of your web site. It contains issues like the scale of your header, the icons you need to use, the titles of your pages, the layouts, and extra.
- Typography. Essential. That is the place you’ll be able to customise all issues font associated. That features the scale of the font, what kind of font you need to use, and the place these fonts will seem. For instance, you would possibly need to go together with Helvetica to your H2 headers, however you would possibly need to go together with Comedian Sans to your title (please, don’t truly do that; it’s simply an instance).
- High Bar. Non-compulsory. This edits the highest space of your web site. You possibly can add social hyperlinks right here, buttons to different pages, and extra.
- Header. Essential. Means that you can absolutely customise the header space of your web site. Add photos or logos, change the font and colours, or no matter else you need to do to make the web site yours.
- Weblog. Non-compulsory. This lets you change the structure of your weblog in addition to which posts seem in your web site’s important web page.
- Sidebar. Non-compulsory. You possibly can add a sidebar to your web site. That is utterly optionally available since your readers can simply use the highest navigation bar to get round your web site.
- Footer widgets. Non-compulsory. Add instruments and customise your footer.
- Footer Backside. Non-compulsory. That is the a part of the web site with the copyright and speak to data. It’s probably necessary–particularly for those who’re working a enterprise.
Now, customise your web site to your coronary heart’s need. When you’re completed, click on Publish, and voila! Your web site will replace routinely to replicate your adjustments.
Your web site’s nonetheless going to look just a little sparse. We have to create some pages for it.
Step 7: Construct Your Web site’s Structure
In case your web site is a home, it’s at the moment an empty lot. It has a strong basis and it’s related to important utilities—but it surely wants the partitions and rooms.
To construct these, it’s essential create net pages. These are paperwork on the web that readers entry by way of your web site.
However it is best to consider them because the rooms of your own home. These are the areas guests will see and get to know you and your web site.
Whereas there are loads of several types of net pages that exist, probably the most important ones are:
- Homepage. That is the principle web page to your web site. It’s what readers see first, so it’s very necessary.
- Contact web page. This web page reveals how your customers can contact you. This may be vitally necessary, relying on your corporation.
- About web page. This web page tells new guests all about your web site and/or enterprise. Usually, companies will put their “model story” right here about how they got here to be.
- On-line retailer. That is the place your readers should purchase services from you. An on-line retailer will also be vitally necessary relying on your corporation.
- Weblog web page. Weblog web page. This web page is the place all your weblog posts go. Should you plan on publishing articles for readers to learn (which it is best to—61% of consumers make buy selections primarily based on weblog content material), this will probably be a vital a part of your web site.
Creating pages on WordPress simply takes a couple of clicks. Let’s soar into how one can create a very powerful web page now to your web site.
Methods to Create a Homepage
OceanWP offers you two alternative ways to create a homepage:
- Your newest posts. Your homepage showcases your newest weblog posts.
- A static web page. You create a web page to turn into your private home web page.
The primary choice is easy: Create weblog posts and the homepage will routinely present all of your newest weblog posts.
That’s why we need to stroll you thru making a static web page to your web site. This may be particularly helpful for firms that simply desire a branded web page to introduce their viewers to the web site.
It’s additionally way more customizable than a web page exhibiting your newest weblog posts.
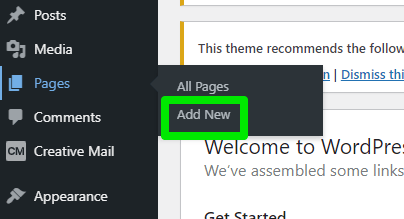
First, head again to your WordPress web site dashboard and click on on Pages>Add New.
Now, you’ll be in WordPress’s web page editor mode. This space permits you to create a web page by including textual content, photos, movies, memes, or no matter else you need to showcase in your homepage (or every other web page for that matter).
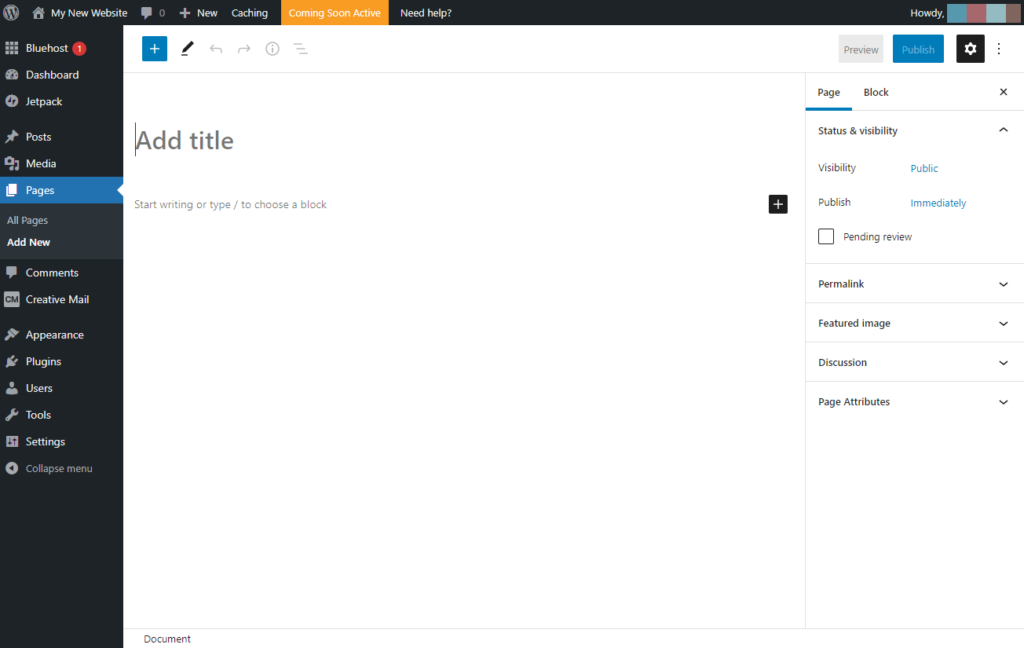
Within the Add title field you’ll be able to create the — you guessed it — title to your house web page. This can show a giant piece of textual content on the high. Beneath that’s the content material field the place you’ll be able to add textual content or media.
On the highest left, you’ll be able to click on on the + button so as to add new content material blocks.
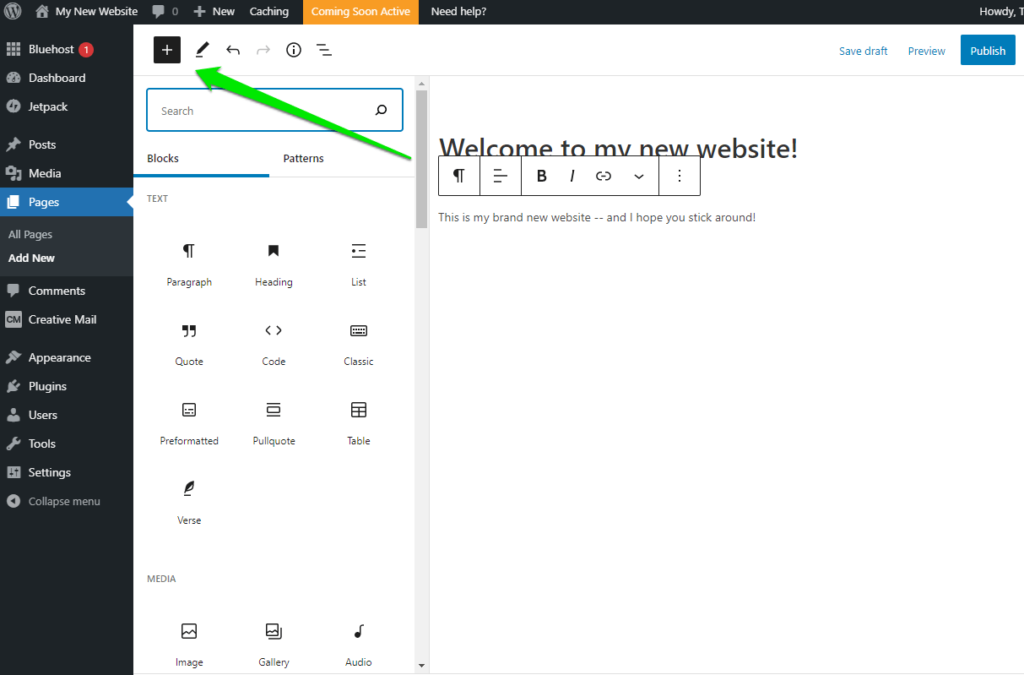
This can be a essential space that permits you to simply add media, quotes, pull quotes, new paragraphs, headings, and extra.
On the highest proper, you’ll see 5 buttons:
- Save Draft. This lets you save your progress as you edit your homepage.
- Preview. This provides you a take a look at what your web page will appear to be when you publish it.
- Publish. This truly publishes the draft.
- Settings (Gear Icon). This space permits you to do plenty of issues together with modifying the font dimension for every block (underneath the Block part). You’ll additionally be capable to set the visibility to your homepage, schedule a time to publish the web page, change the URL, set the featured picture, and permit for feedback (underneath the Web page part).
- Additional instruments (Three Dots). This menu contains plenty of additional instruments you need to use to alter the visualization of your web page editor.
Create a fundamental homepage now by including a title and content material. It doesn’t should be fancy. We’re simply doing this as a check run. You possibly can at all times change it later.
When you’ve achieved that, click on Publish within the high proper. The web site will now be dwell!
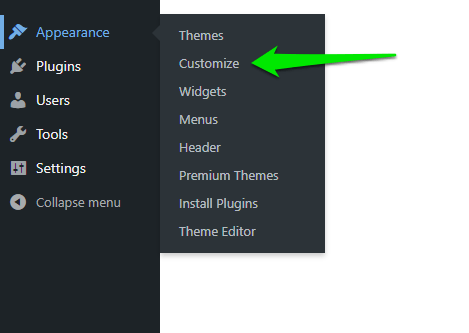
However that doesn’t imply it’s your homepage but. Go to Look>Customise on the sidebar.
Then go to Homepage Settings. Now you can click on on A static web page beneath your homepage displaying settings. This can assist you to choose the homepage you simply created within the dropdown menu beneath Homepage.
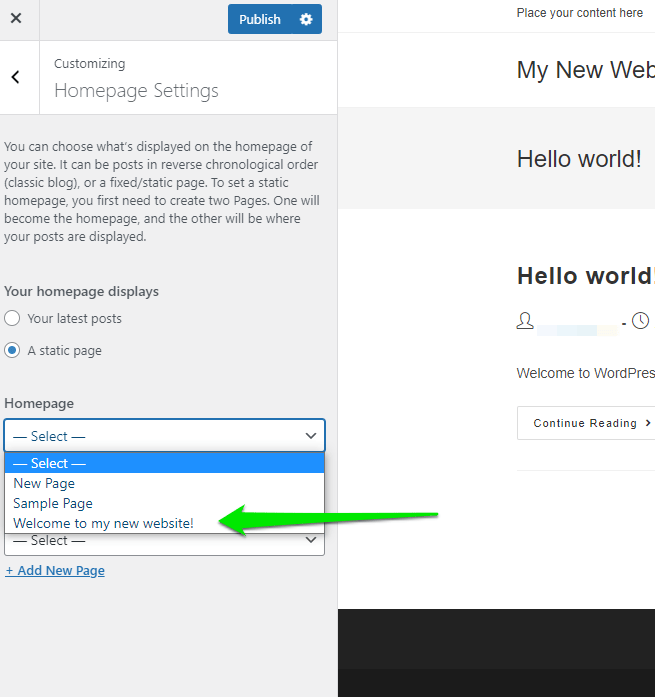
Choose that web page, then click on on Publish on the high.
Congrats!! You simply created your very first homepage.
Methods to Create an About, Contact, Touchdown, or Any Different Web page
Creating every other web page to your web site will consist principally of the identical steps as your homepage.
First, head again to your WordPress web site dashboard and click on on Pages>Add New.
And within the web page editor create the web page you need to create. It’s actually so simple as that.
Nonetheless, for those who permit your readers to simply uncover that net web page, you’ll must create some navigational components for them.
Step 8: Join Your Internet Pages with Menus
Creating menus goes to range from theme to theme. Nonetheless, in OceanWP it’s pretty easy.
Out of your WordPress dashboard, click on on Look>Customise.
Then click on on Menu>Create New Menu.
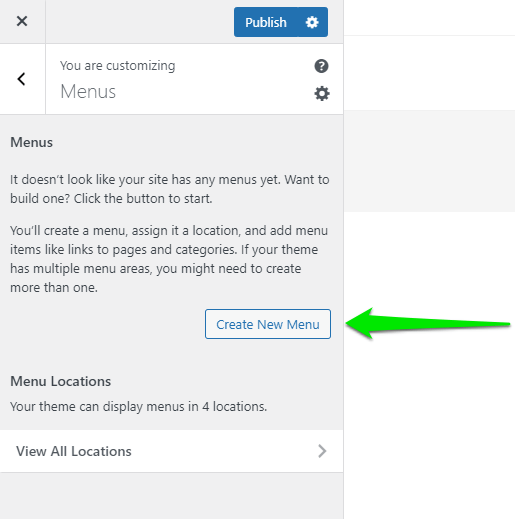
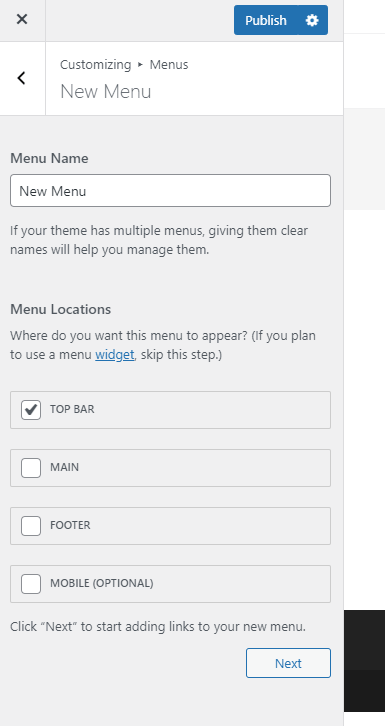
Right here you’ll be capable to give your menu a reputation and select the place you’d prefer it to look.
For now, we’re going to go together with the very inventive title “New Menu” and select High Bar for the menu location. You possibly can at all times change this later. Then click on Subsequent.
Now it’s time so as to add some hyperlinks. Click on on + Add Objects to start out constructing your menu.
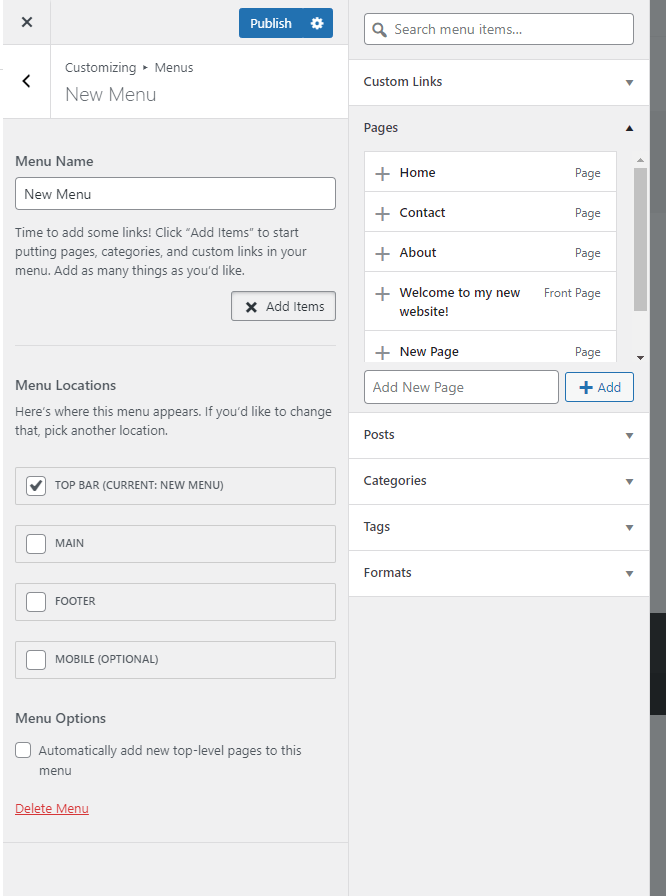
From right here you’ll be able to add pages through the pages that you’ve already created, customized hyperlinks to totally different web sites, weblog posts, classes, tags, and extra.
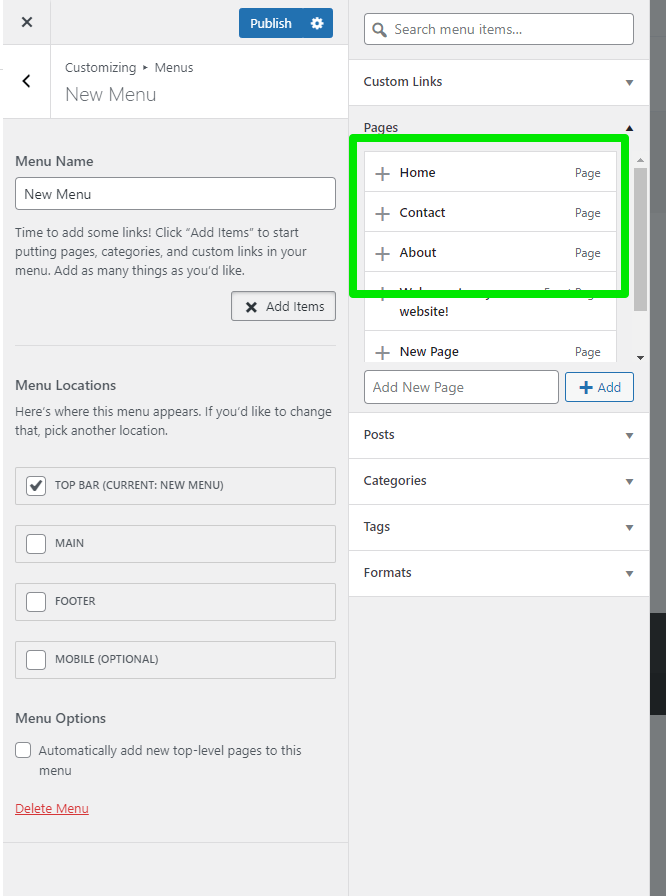
For now, we’re going so as to add our Residence, Contact, and About pages (which we created within the earlier elements) onto the menu.
Click on on the pages underneath the Pages part to take action.
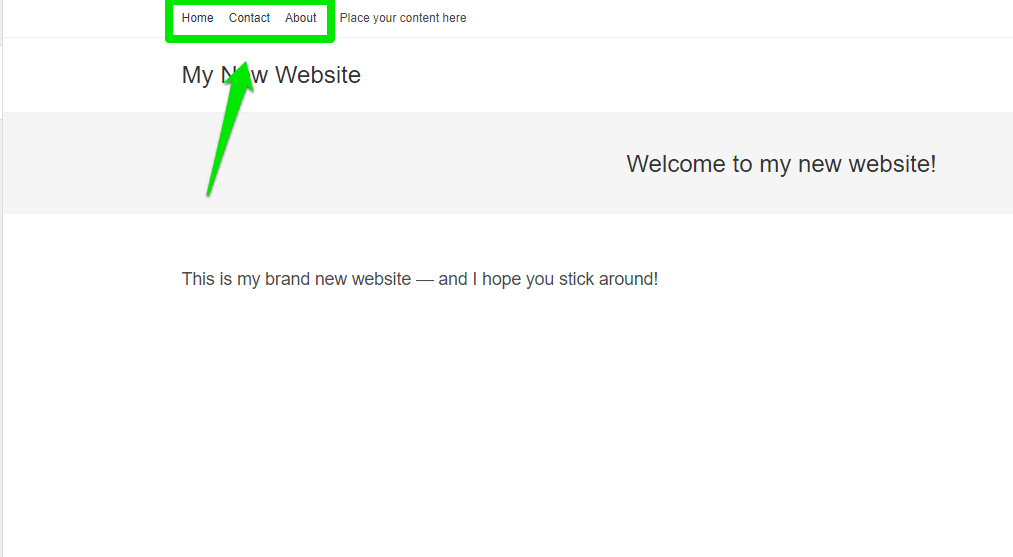
They are going to now seem within the high bar menu of your important web site.
One factor to notice is you could create drop-down menus for greater classes you’ll be able to consider.
For instance, let’s say we need to add our Contact web page to our About part. You are able to do so by dragging the Contact menu beneath the About part when customizing the menu (see under).
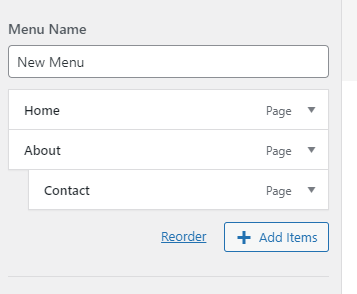
Your About menu will now embody a dropdown the place guests can entry your Contact web page.
When you’re completed making the menus, click on on Publish on the high.
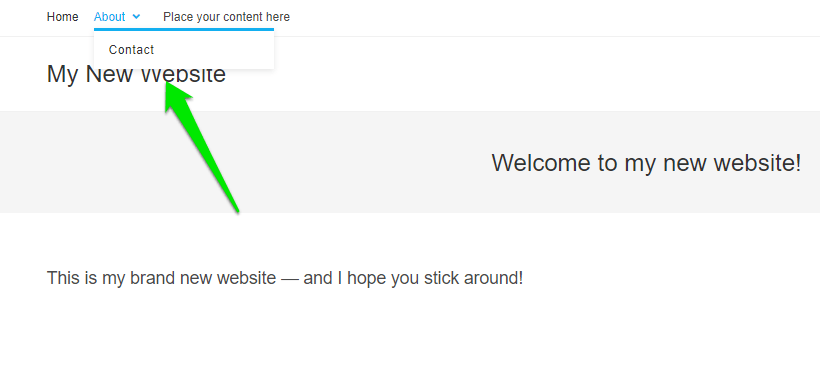
And also you’re achieved! You simply created your very first web site.
Take a look at your new web site in all its glory:
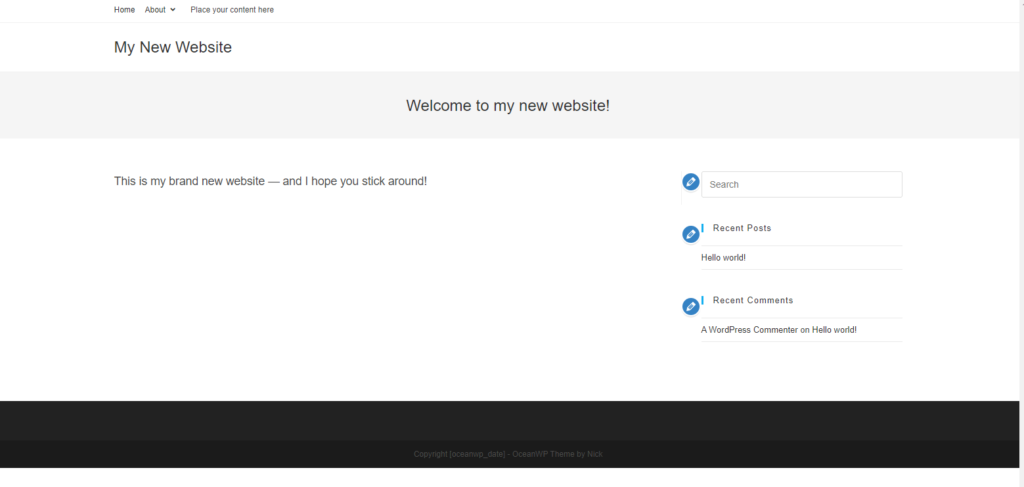
Okay, we admit: It’s just a little underwhelming proper now—however that’s since you haven’t gone about branding it or including any actual content material but!
We confirmed you find out how to get your web site up and working. Now it’s YOUR flip to make it with content material.
Step 9: Create Compelling Content material for Your Web site
What you finally select to incorporate in your web site for content material is solely as much as you.
Nonetheless, there are two areas that we’ve discovered to be a very powerful in relation to profitable web sites: design and content material.
Beneath are our greatest sources for leveling up each:
Designing Your Web site
Writing On Your Web site
Making a Web site: Your High Questions Answered
You Simply Made Your First Web site! What’s Subsequent?
- Finest deal for internet hosting
- Excellent for WordPress websites
- Free area registration
- Begins at $1.99/month
Congrats on creating your first web site! Significantly, it is best to pat your self on the again.
Now that you simply’ve signed up for Hostinger and put in WordPress, there’s nonetheless some work to be achieved as soon as your web site is up and working—the journey has simply begun.
You’ll nonetheless have to tweak and make changes to your web site usually to optimize its efficiency and guarantee it’s assembly your viewers’s wants. If you wish to put your web site to be just right for you and make some additional money, take a look at these wonderful sources on monetizing your web site:
All of those guides are beginner-friendly and straightforward to comply with. Take pleasure in and good luck!
[ad_2]